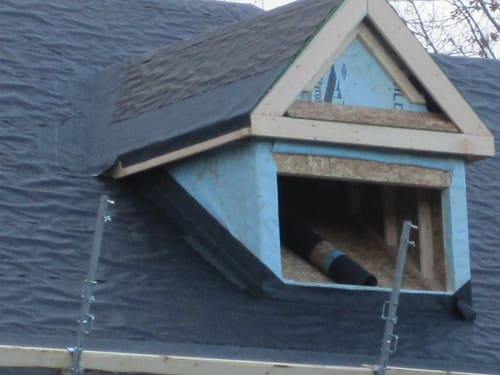
Trace wind openings and wet wall sections uphill to cladding joints, trim, roof-to-wall flashing, gutter ends, and the drainage layer behind the surface.
Siding trouble on a Beaverton home often begins above the panel that looks damaged. A gutter
end spills against trim, wind opens a cladding joint, or roof-to-wall flashing misses the
drainage plane. After months of sustained rain, the visible stain may sit below wet sheathing
and swollen framing. Call (971) 298-7833 for
an exterior inspection that checks the wall, roof edge, and gutter path together.
Find the Water Source Before Closing the Wall
Replacing a cracked panel will not stop water entering above it. The inspection should trace
roof runoff, window and trim joints, penetrations, flashing transitions, and gutter discharge.
Interior staining, soft trim, peeling finish, or a musty wall can help locate the affected
area, but opening may be required to learn how far moisture has traveled behind the surface.
Once cladding is removed, the condition of housewrap, flashing, sheathing, insulation, and
framing determines the real repair. Wet material must be addressed before the wall is closed.
The proposal should state what is included, how hidden damage will be handled, and which
water-entry detail will be rebuilt so the new surface does not conceal the old problem.
Roof-to-Wall Flashing Is Part of the Siding Scope
Where a roof meets a vertical wall, step flashing carries water onto the shingle below and
out toward the eave. A kick-out at the bottom should direct that flow away from the wall and
into the gutter. Missing, buried, or poorly integrated flashing can feed water behind trim
and siding every time it rains. These details may require coordinated
roof leak repair before the cladding is restored.
Gutter Overflow Can Mimic a Siding Failure
A sagging run or blocked outlet can pour water down one elevation even when the siding above
it is intact. Repeated wetting stains surfaces and can reach joints that are not designed for
concentrated roof runoff. Inspect the eave, fascia, gutter end, downspout, and wall below as
one assembly. If drainage is the source, include
gutter correction in the written scope.
Wind Damage Needs More Than a Driveway Count
Loose panels, cracked edges, shifted trim, and open corner details can admit wind-driven rain
while appearing minor from below. The inspection should check fasteners, locks or joints,
nearby openings, and the water-resistive layer where accessible. Any temporary securing must
be identified as temporary, with a permanent repair planned around the actual cladding system.
Exterior water control depends on roof edges, wall flashing, trim, and siding working together.
Material Identification Comes Before Matching
Vinyl, fiber cement, wood, and engineered products use different fastening, clearance, joint,
and finishing details. The contractor should identify the existing product and its condition
before promising a match. Sun exposure and age can make even the correct color look different
after installation. A clear scope states whether the repair is a small patch, a defined wall
section, or an elevation designed around a deliberate transition.
Installation Must Preserve Drainage and Drying
Cladding is the outer layer of a wall system, not the only water barrier. Flashing and the
water-resistive layer must direct incidental moisture back outside, while clearances and
joints allow the assembly to perform as designed. New siding installed tightly over wet or
damaged substrate leaves the failure in place. Photos during opening and before closure make
the repair easier to verify.
Build One Written Exterior Scope
When wind or rain affects roofing, gutters, and siding, list each trade area and its water
connection. The quote should name removal, substrate assumptions, flashing, material,
finish, disposal, access, cleanup, and workmanship terms. The
photo inspection can document the roof source, while the
cost guide supplies roof planning ranges if both systems need
work.
The practical goal is not a panel that merely looks new. It is a wall that receives water
from the roof and gutters in the intended places, drains incidental moisture outward, and
closes over dry, sound material. Ask the contractor to show where the water entered and how
the finished details change that path before approving the repair.
Frequently Asked Questions
Why is siding damage showing below a roof-to-wall joint?
Step flashing, kick-out flashing, a gutter end, or a low-slope transition may be sending roof water behind the cladding. The inspection should begin above the damaged wall and follow the drainage path before surface panels are replaced.
Can a small siding opening hide a larger wet area?
Yes. Water can spread behind cladding along housewrap, sheathing, trim, and framing. The repair area may need to be opened until dry, sound material and the original entry detail are found.
What if an older siding profile cannot be matched exactly?
The contractor should explain the closest available match and show where transitions will fall. Depending on visibility and material condition, choices may include a limited patch, a larger defined section, or one complete elevation.
Should loose siding after wind be repaired before the next rain?
A displaced panel or trim opening should be inspected promptly because wind-driven rain can reach the water-resistive layer and sheathing. Temporary securing may be appropriate when safe, followed by a permanent material and flashing repair.